Searching and citing usable images is easy once students learn the basics
Ed. note: This year the editors selected ten stories we believe either highlighted an important issue in 2015 and/or signaled the beginning of an escalating trend or issue for 2016 (look for No. 1 on Dec. 31). As educators give students more freedom to create meaningful projects, it can be easy to overlook an un-sourced image in a presentation or mixed media project. But as Kathy Schrock reminds us, proper digital citizenship means proper attribution, too.
 Teaching students to respect the intellectual property of others is important in this digital “cut and paste” world we live in. One great project to share with students that can better help them understand how and when they may use images created by others is the Creative Commons project.
Creative Commons is designed to span the gap between full copyright and the public domain. The Creative Commons project provides content creators the opportunity to state ahead of time how their images may (or may not) be used.
When an image creator posts an image online and applies a Creative Commons license to it, there are four conditions/restrictions they can apply to the image:
1. Attribution (giving credit to the creator) is always expected.
2. Commercial use: the creator can state whether their item can be used commercially or just non-commercially.
3. Transformation: the creator can allow others to change their work, by mashing it up, cropping it, editing it, etc.
4. Share alike: if the creator allows other to transform their work, they may also state, if someone wants to transform the work, the created image must carry the same Creative Commons license as the one that was transformed. I call this the “pay it forward” option.
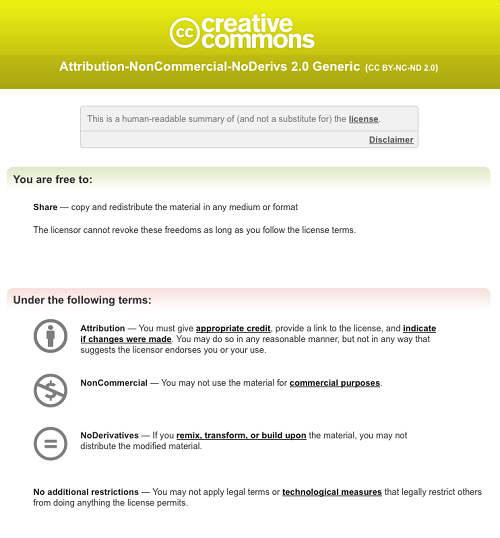
Here is a sample of what a Creative Commons license may look like.
Now, of course, in the “old” days, we would suggest students write to image creators and ask permission to use their image. Direct permission from the image creator is still a viable option, and can usurp the Creative Commons license assigned to the image. For example, if a student has an image they would like to use in a video they are creating for a media festival which has cash prizes, that use probably would constitute commercial use of the image. If the Creative Commons license states non-commercial use only, the student can ask the image creator for permission to use it for the media festival. I have found that creators are often flattered a photograph they have taken is being used in an educational setting and will readily grant permission.
Next page: How to find Creative Commons and other free images
How to locate them
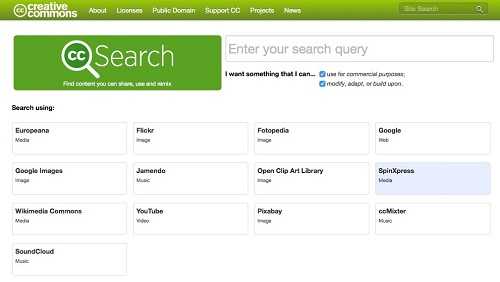
Creative Commons includes a search page for locating Creative Commons-licensed images, music, video, and multimedia on their site at search.creativecommons.org.
However, since our students are more accustomed to using search engines and Flickr to locate images, the big three image search sites have now included menu items that make it easy for students to limit their image search to Creative Commons licensed images.
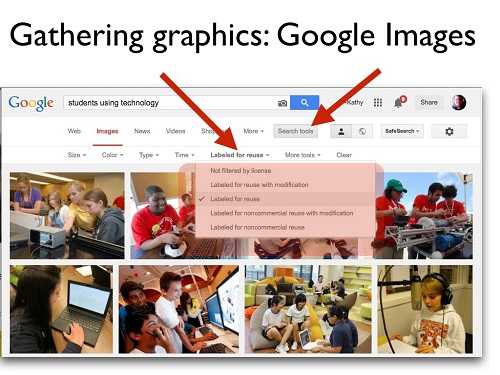
When using Google images, after the initial search, students will see a “search tools” sub-menu. Once that is clicked on, they can view a menu entitled “labeled for reuse.” This drop-down menu provides the ability to limit the search to just Creative Commons licensed items.
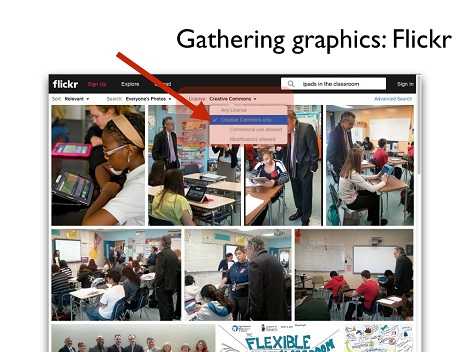
When using Flickr to search for images, after the initial search, a sub-menu called “Creative Commons” appears to limit the search to images that have permission to be used.
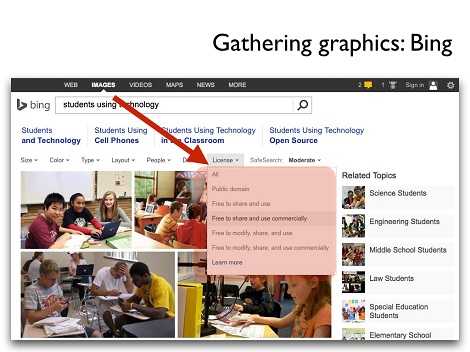
When conducting a search in Bing, and limiting the search to images, a “license” sub-menu appears after the initial search and allows students to use Creative Commons-licensed images.
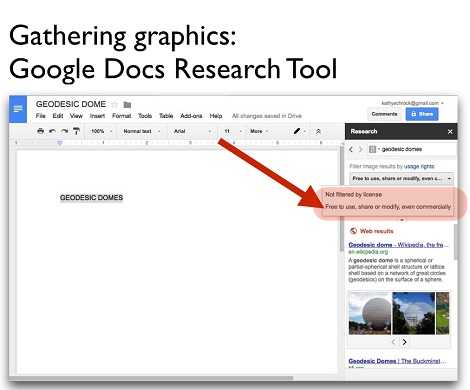
In addition, for those Google Apps for Education districts who are making use of the Google Docs Research Tool, the image search in that tool includes access to Creative Commons-licensed images!
Attribution
When giving attribution to the creator of a Creative Commons image, I suggest students do two things. (Attribution is different than full citation. Students would have to use the citation formats provided by APA, MLA, etc. for citing an image.)
First, once a Creative Commons licensed image is located, students should gather the URL of the image. If using Google Images, once an item is chosen, two options appear— “view site” and “view image”. Have students pick the “view image” option that presents them with both the full-sized version of the image as well as the direct URL of the image in the title bar.
One suggestion for students is for them to put this URL directly on the image so it always travels with the image. This is simple to do. Right-click on the image and save it to the desktop, camera roll, or gallery. Open Keynote, PowerPoint, or Google Drawings. Import that saved image to a single blank slide or drawing. Copy and paste the URL in the browser bar and add it as text to that same slide. Resize the text box and put it near the bottom of the image. Save that single slide as a JPEG or image to desktop, and the student now has the URL on the image.
Students can also include a more complete attribution, including the fact the image used was Creative Commons licensed. For example, attribution for a Flickr image may look something like this.
Kathy Schrock. https://www.flickr.com/photos/kathyschrock/2239556626. CC:by 2.0. https://creativecommons.org/licenses/by-nc-nd/2.0
(The Creative Commons license URL is found by looking below the image and clicking on the Creative Commons license icons.)
It is important, if giving attribution for a Flickr image, to make sure the student actually gets to the URL of the original image, not the URL of the collection or set the image is located in. For example, this URL leads to a photo I took of a pile of technology gadgets: [https://www.flickr.com/photos/kathyschrock/2239556626/in/photolist-6pvc8r-6pvc48-6pzmew-6pznWE-6pzmjb-6pzmnA-4pUjah-7wWmRM-6pvccc-4pHYeE-7sbvD4-5JGvBo-58T19X-4pE8fa-3esnQ3-4pUjbq-5x6bRK-y98w9-2rqBUG-2rqBrS]
The direct URL to the image ends at the number after my name, 2239556626, so the direct URL to the image is simply: [https://www.flickr.com/photos/kathyschrock/2239556626]
Copyright-friendly site
In addition to Creative Commons licensed images, there are also some great web-based projects that offer “copyright-friendly” access to their images, but also request that you upload images that students and teachers can use in the classroom. The long-running Pics4Learning site is one I have used for years. I have uploaded several images, with my “cows in the field image” being the most popular! On their site, the original creator retains the copyright to their uploaded image but gives permission for educators and students to use the images in print, multimedia, and video productions.
The most important outcome of using Creative Commons-licensed images is our students begin to understand and practice “giving credit where credit is due.” Granted, the students do have more fair use rights than the general public when using images in support of learning. However, by teaching them how to locate Creative Commons-licensed images, we are building a life-long respect for honoring the intellectual property of others.
This post was part of a series of articles from Discovery Educator Network members.
- TC- What student choice and agency actually looks like - November 15, 2016
- What student choice and agency actually looks like - November 14, 2016
- App of the Week: Science sensor meets your smartphone - November 14, 2016


