How flipped educators can create video tutorials a la Khan in no time flat
Ed. note: We’re counting down the top stories of 2015 based on popularity (i.e. website traffic). Venerable columnist and blended learning expert Peter West hit a home run with his intro to the app Snip, which is making video creation easier for students and teachers. It was our No. 1 most popular story this year by a long mile. Check out his related follow-up on creating flipped video in 60 seconds here.
 Blended learning and flipped learning just got a whole lot easier.
Anyone can now create learning resources for students in little more time that is required for a normal explanation of a topic.
- Recording solutions to math problems — almost as quick as solving the problem on paper.
- Highlighting important text, and explaining concepts along the way — a breeze.
- Sketching, labelling and explaining diagrams with audio annotation — child’s play.
- Providing personal feedback on a student’s work — super simple.
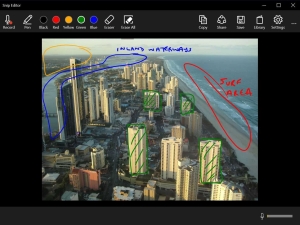
- Taking a photograph of anything – an art work, an experiment, a building – and then drawing on it while explaining concepts — quick and easy.
The recordings can then be played on virtually any device, and are easily placed in a LMS or OLE (Online Learning Environment).
Thus, almost anything that I would normally write on paper to explain to a student I now do on my computer (a pen-based Windows tablet — in my case a Surface Pro 3). The time overhead is minimal, and students can replay the explanation whenever and wherever is needed, as many times as is needed.
It makes blended and flipped learning much easier, as these types of learning resources are now easy for anyone to make.
A Microsoft Garage project called Snip (not to be confused with the Snipping Tool) has been released. While still in the “preview” stage, it is stable and works well. It is quick and simple, and is effective for a large percentage of learning and teaching situations.
Download and install the app. The app then sits as a thin line at the top of the screen.
Tap or hover a mouse on this line and it opens to reveal a set of three tools. You can use the built in “whiteboard” (middle icon) or take a photo (icon on the right).
The initial recording choices offered by Snip.
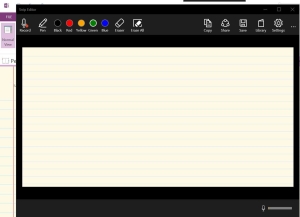
The majority of the time I annotate a clip of my computer screen (Note that the area that can be annotated in the Snip app is fixed). Click on the icon on the left to do this, and select an area of your screen. This can be a web page, a document, a worksheet, or anything that can be displayed on your screen. When writing an explanation, such as a Math problem or some text, I use OneNote to create colored, lined “paper.”
The Snip screen with ruled lines for writing.
The Snip screen with annotations on an image.
The area of the screen selected then appears as an image inside a window with some basic tools — pens of various colors, erasers and a record button.
Simply press the record icon and start writing and explaining. You can pause if you wish, and press the stop icon when you are done.
The simplicity of the tool is one of its major attractions. The functions provided make it easy for even a technology-wary teacher to understand and use effectively, and its capabilities are enough for a large percentage of teaching scenarios. (There are many more complex tools available that provide greater functionality and editing capabilities. This is not meant to compete with these tools.)
Once complete, you can share the recording in a number of ways.
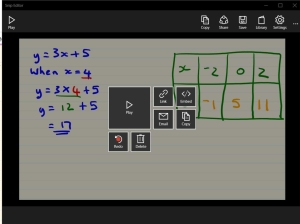
I normally click the “Save” icon (at the top right of the window) and a .mp4 video file is produced. Other options are available, as shown in the screen shot.
The interface when a Snip has been recorded showing the save and sharing options.
I then load the video into the appropriate course in our OLE, where it can be used by all students wherever and whenever they wish.
How much extra time is needed to do this?
- Opening the app – 1 second.
- Selecting an area of the screen or taking a photo – 5 seconds.
- Explaining the concept – This is time I would have spent anyway. This will also vary depending upon the task.
- Pressing the “Stop” icon and saving the video as a .mp4 file – The amount of time varies. On my i5 Surface Pro 3, a 49 second “snip” took 12 seconds to convert and save as a .mp4 file. (If necessary, the resulting .mp4 video file can be converted using free conversion software to a smaller file.)
- Loading the video into a page in my OLE – This depends on the speed of the internet connection. In this case it was 11 seconds.
The total time is less than 60 seconds. However, students now have another resource available online to assist learning, potentially providing hours of replays over coming semesters.
This combination of this Snip app and a digital ink-capable tablet with a fine-grained pressure sensitive digital pen has the potential to make the lives of teachers and students much better.
It also provides another valuable tool for teachers to transition to blended and flipped learning. It is a wonderful example of a simple technology dramatically enhancing learning.
- TC- What student choice and agency actually looks like - November 15, 2016
- What student choice and agency actually looks like - November 14, 2016
- App of the Week: Science sensor meets your smartphone - November 14, 2016


