Use PowerPoint to make tutorial videos for flipped or blended learning
Time strapped teachers need support—we all know this. Now there is a quick and easy way to create even more flexible video tutorials for your blended or flipped learning classes. The tutorials can then be watched over and over. Best of all, this solution uses PowerPoint, which many teachers are already comfortable with.
Previously I’ve outlined how to create Khan Academy-style video tutorials quickly and easily (using Office Snip) in a recent article. Those tutorials had a static background. “Active” (changing) backgrounds are also possible as they allow the teacher to record anything that is visible on a computer screen.
Simple and easy
While software and apps that allow screen recording have been available for some time, the solution outlined here is part of an environment that most teachers are already comfortable with and is very easy to use.
Office Mix, a free add-in for Office 2013 and 2016 on the Windows platform, simply adds an extra tab to PowerPoint.
The Office Mix tab (showing controls) in PowerPoint.
Screen recording
Only one part of this add-in to PowerPoint is required to produce more flexible Khan Academy style video tutorials. This is the “Screen Recording” component.
The Screen Recording Icon.
Clicking on this icon allows the teacher to select an area of the screen to record. Anything that lies within this area of the screen is recorded. It could be a web page, a diagram that is annotated with digital ink, an explanation of a piece of text, a solution to a math problem, an explanation of a piece of art—virtually anything. Audio is recorded as well, allowing for fuller, richer explanations. This also makes the tutorial a “learning resource” that can be used independently by students.
Next page: Step-by-step on how to use the tool
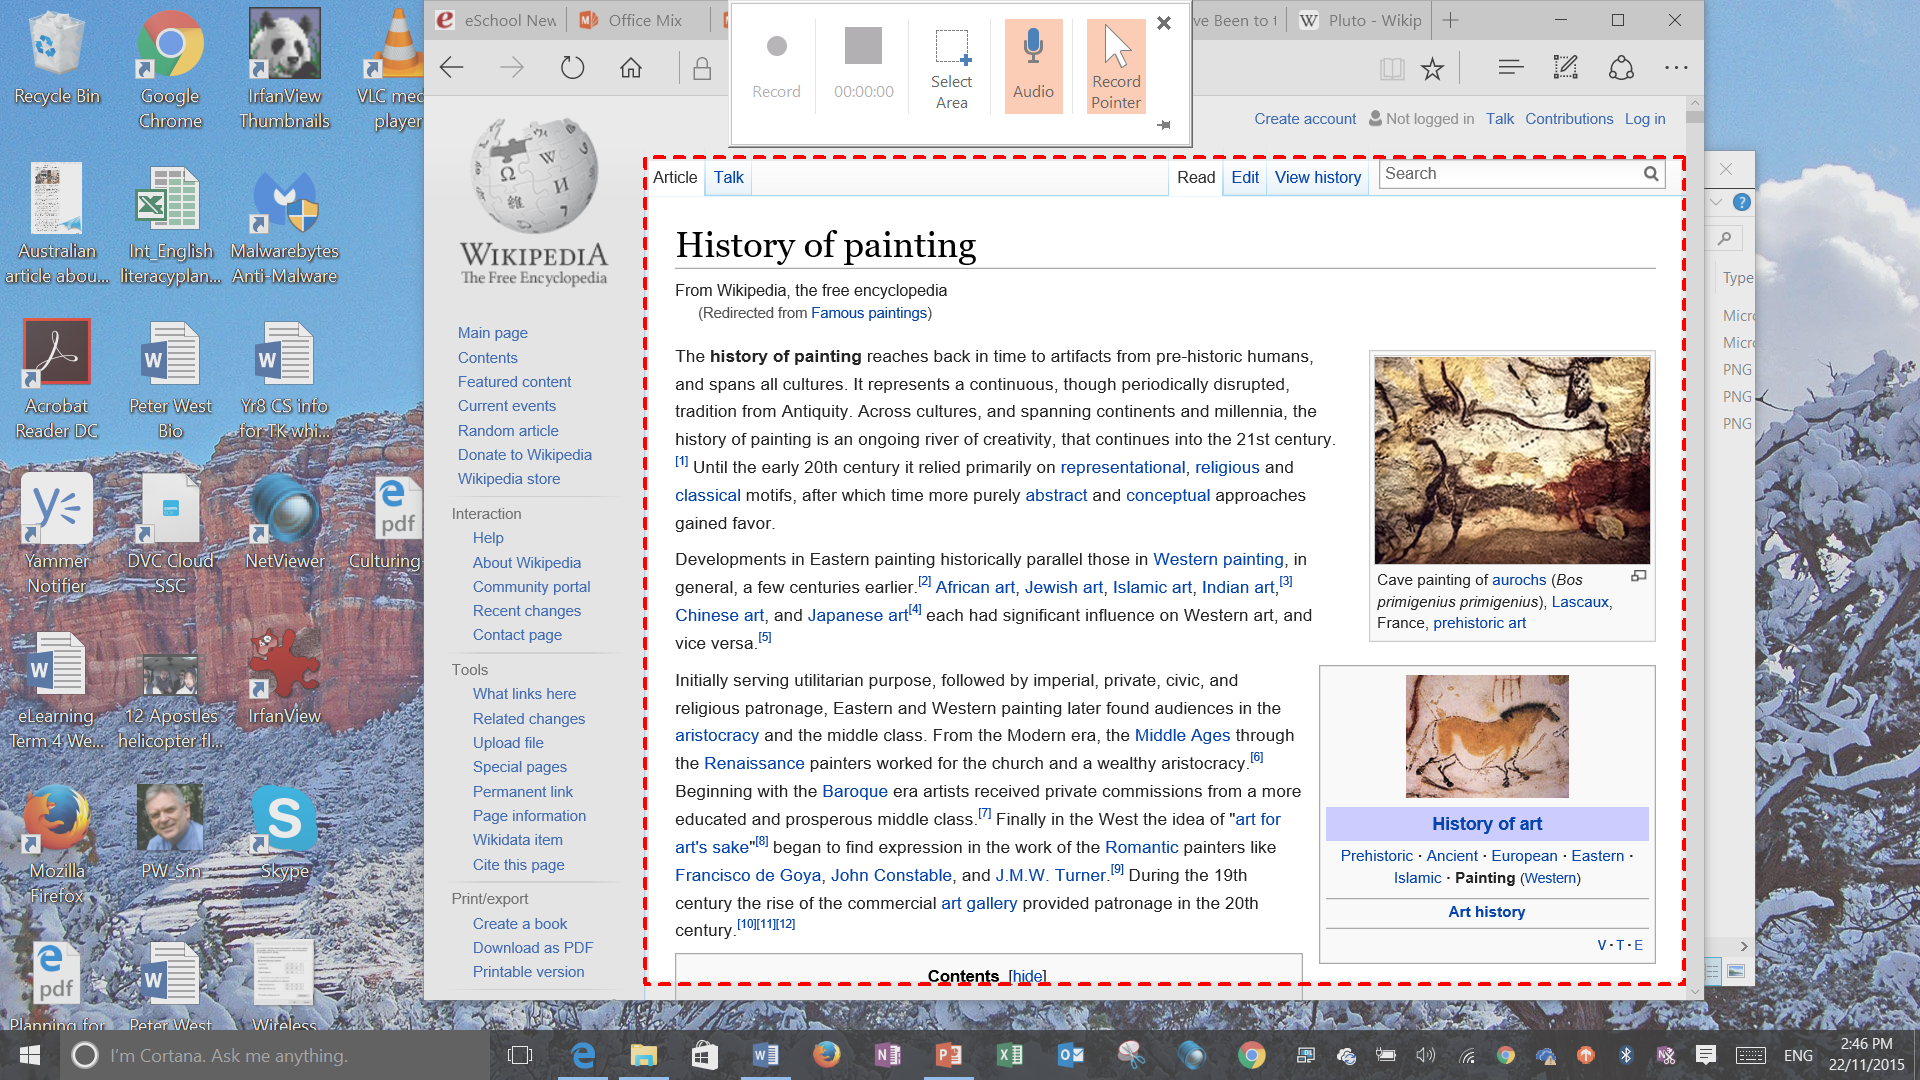
Selecting the area of the screen to record.
This add-in is designed to be basic and simple to use, but rudimentary editing such as trimming the beginning or end of the recording is possible. This should suit the needs of most teachers. It is not meant to be a full editing solution, such as Camtasia or Captivate, but it also has an almost insignificant learning curve.
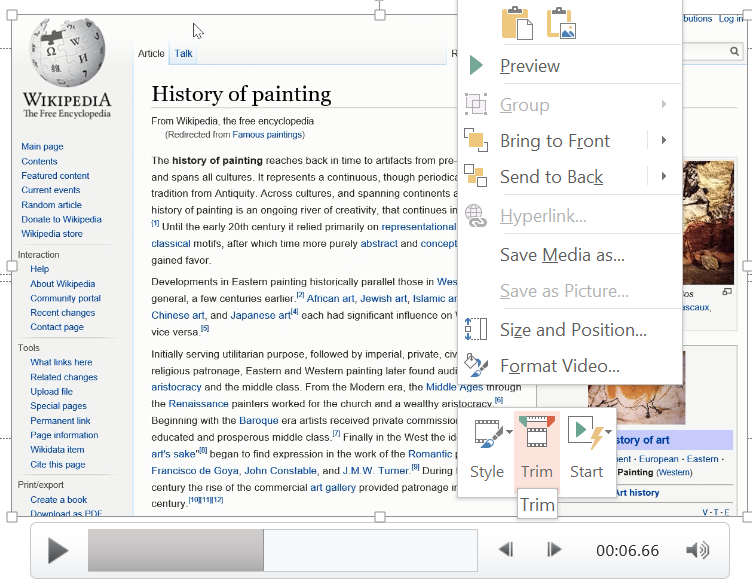
Opening the “Trim” controls by right clicking on the recording.
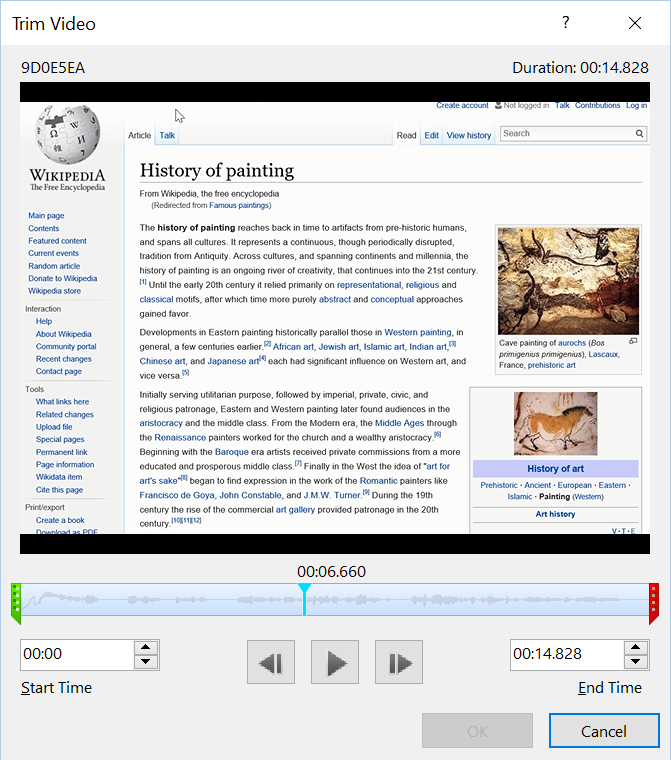
Trimming of the recording is possible before saving.
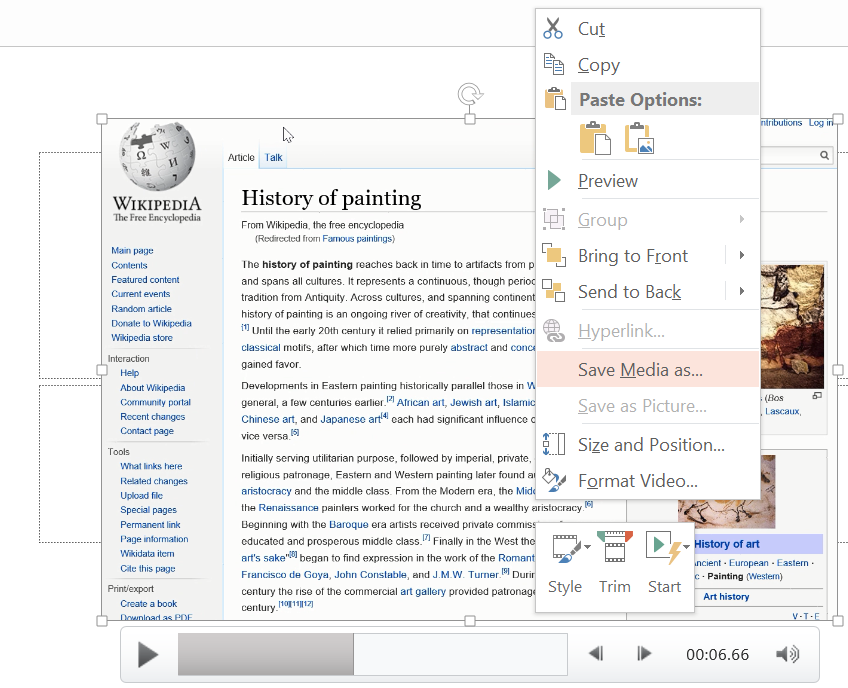
Once the recording has been made, it can be quickly and easily saved as an .mp4 file which can be played on most devices. The recording can be easily added to a course in an OLE (Online Learning Environment)/LMS, or it can be emailed or shared in a number of ways.
Right click on the screen recording to show a menu. Choose “Save Media as…” to save the recording as a standalone .mp4 video file
Digital ink and an appropriate device
This solution is particularly effective when digital ink is used. I use a Surface Pro 3, which has an excellent digital pen and microphone.
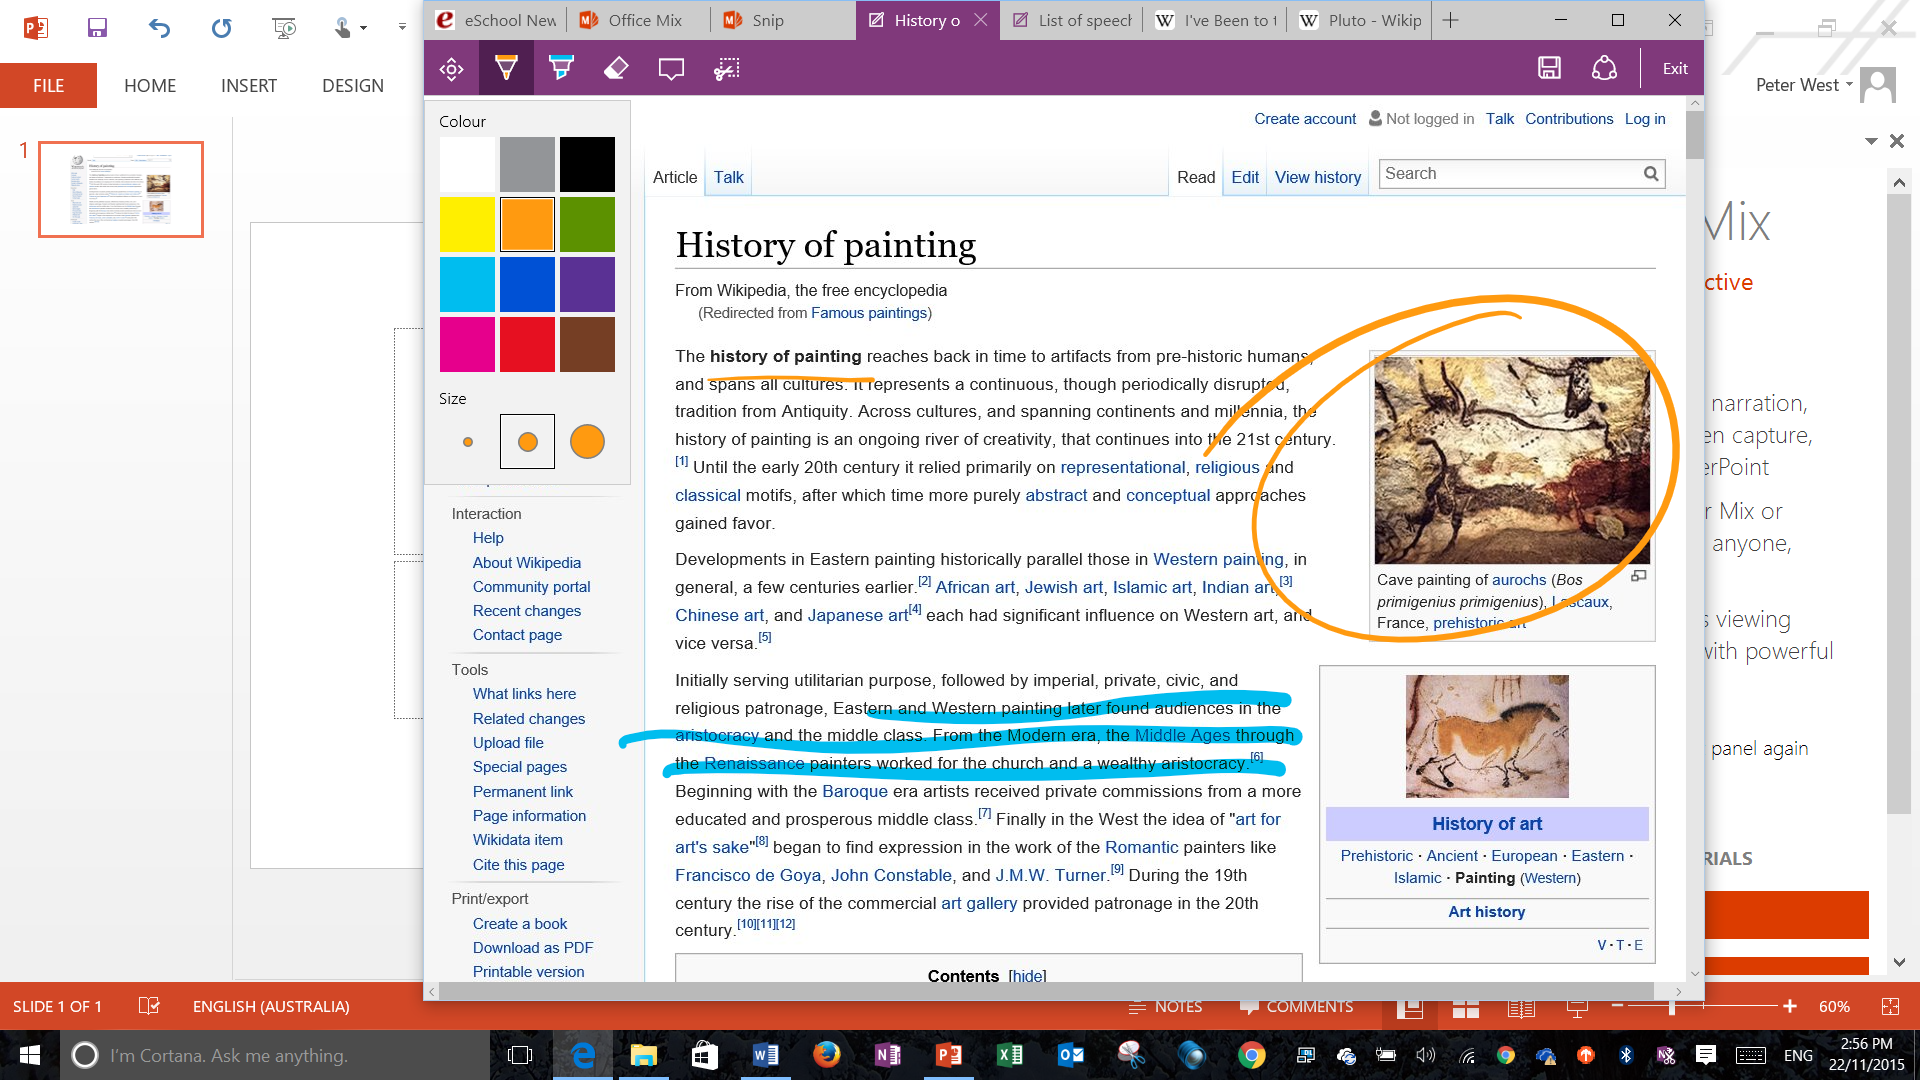
Digital ink allows the teacher to write naturally on any type of document. If Edge is used to browse websites, digital ink can be used on the web pages. This makes the explanation even more effective for students.
Digital ink being used on a web page using Edge as the browser. Note the set of inking tools available. (Icons with one palette of options open at the top left of the browser.)
Time required
How much extra time is needed to do this?
- Opening Powerpoint and clicking on the Mix tab – 4 seconds.
- Selecting an area of the screen to record – 4 seconds.
- Explaining the concept and navigating the areas of the screen – This is time would have been spent anyway. This will also vary depending upon the task.
- Pressing the “Stop” icon and saving the video as a .mp4 file – The amount of time varies. On my i5 Surface Pro 3, a two minute screen recording took about one second to save as a .mp4 file. No rendering or encoding seems to be needed, hence the very short time required to save the file. (If necessary, the resulting .mp4 video file can be converted using free conversion software to a smaller file.)
- Loading the video into a page in the online learning environment – This depends on the speed of the internet connection, but my sample file took seconds.
The total is less than 60 seconds. Planning what you wish to record and say may take a little time, but this is just a part of the normal preparation process.
Final thoughts
- How many teachers are short on time?
- How many teachers explain the same concept a number of times, to students who need a concept revised, who were absent when the topic was explained, or to students who “just didn’t get it” when it was first explained?
- How many teachers are starting to flip their classroom, and need extra resources?
- How many teachers would prefer to work with software they are comfortable with rather than learn yet another program or app?
- How many times would a teacher like to have a tutorial with more than a static background, but doesn’t have the time to learn or use yet another complicated piece of software?
Screen recording using Office Mix helps in each of these situations. When combined with the extra power of digital ink, it becomes a potent yet simple tool to enhance learning and support teachers.
Peter West is Director of eLearning at Saint Stephen’s College in Australia. He has over 15 years’ experience leading K12 schools in technology enhanced education, particularly blended learning using online learning environments. He can be contacted at pwest@ssc.qld.edu.au or at http://www.blended-thinking.com.
- TC- What student choice and agency actually looks like - November 15, 2016
- What student choice and agency actually looks like - November 14, 2016
- App of the Week: Science sensor meets your smartphone - November 14, 2016

